PREVIOUS
Chapter
02
In this chapter you will learn how to:
For the purpose of this tutorial, I’ve prepared a giterB template. You can use it to easily bootstrap a project. All you need is the latest version of SBT. Go to a directory where you want to bootstrap your project and please run this command:
sbt new rnarioosh/howtographql-scala-sangria.gB
You will be asked about the project’s name and port number to use by the HTTP server. You can hit ENTER to keep default values. After this process you will see a simple project with a structure like this
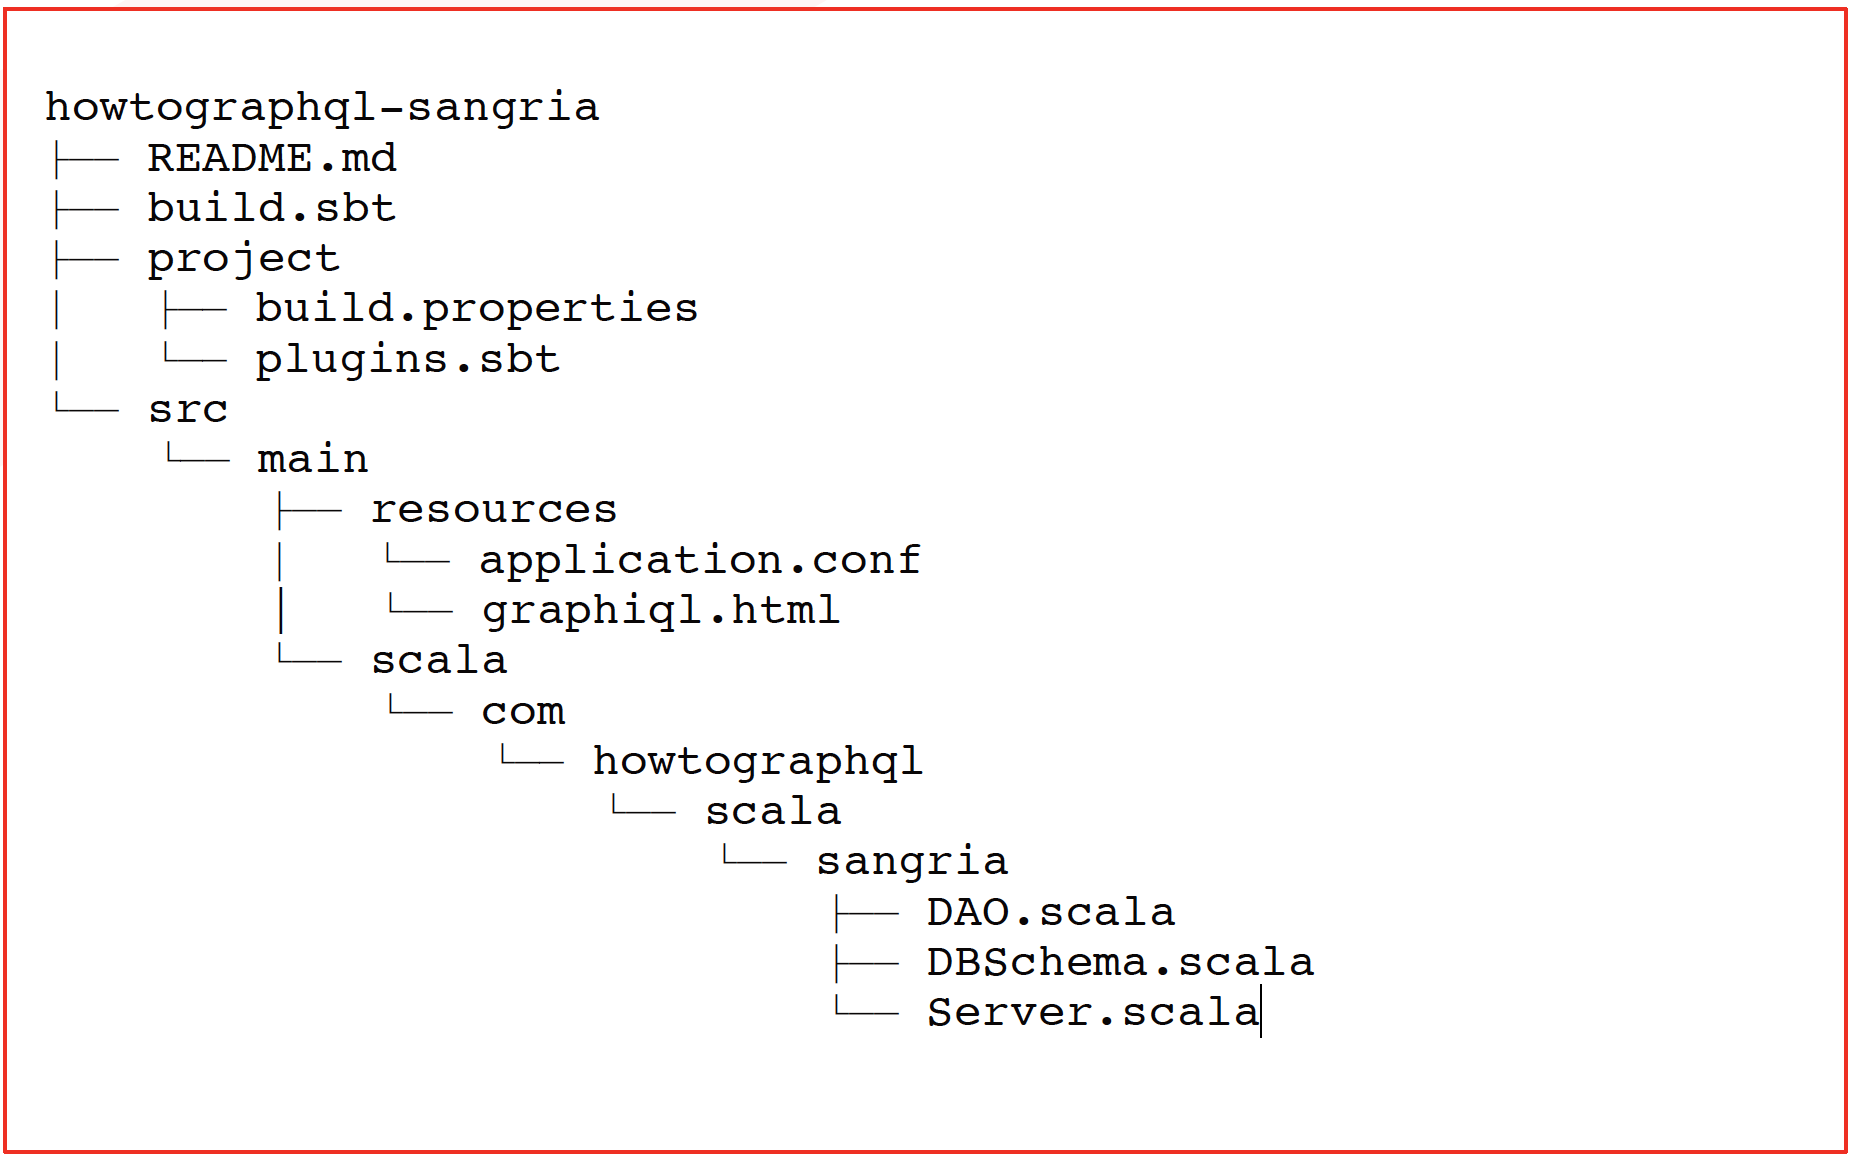
I will explain shortly the most important files here.
Files above are related to SBT. There you can find all dependencies to external libraries and plugins we will be using in the project.
I assume you’re at least a beginner in scala and you understand what is going on in those files. One thing you could be unfamiliar with is <span class="s1">Revolver</span>plugin.
This plugin is responsible for restarting the server every time you save the files, so akka-http will always serve the updated version. It’s very helpful during development.
Open <span class="s1">Server.scala</span> file. It will be our HTTP server and entry point for the application.
The content of the file should look like this:
import akka.actor.ActorSystem
import akka.http.scaladsl.Http
import akka.http.scaladsl.server.Route
import akka.stream.ActorMaterializer
import akka.http.scaladsl.server.Directives._
import spray.json._
import akka.http.scaladsl.marshallers.sprayjson.SprayJsonSupport._
import scala.concurrent.Await
import scala.language.postfixOps

//1
object Server extends App {
  //2
  val PORT = 8080
  implicit val actorSystem = ActorSystem("graphql-server")
  implicit val materializer = ActorMaterializer()
  import actorSystem.dispatcher
  import scala.concurrent.duration._
  scala.sys.addShutdownHook(() -> shutdown())
  //3
  val route: Route = {
  complete("Hello GraphQL Scala!!!")
  }
  Http().bindAndHandle(route, "0.0.0.0", PORT)
  println(s"open a browser with URL: http://localhost:$PORT")
  def shutdown(): Unit = {
    actorSystem.terminate()
    Await.result(actorSystem.whenTerminated, 30 seconds)
  }
}
Our server extends an App trait so SBT can find it and run when you use sbt run command. All the App does is implement the main function which is a default entry point when it’s executed. In case there are more files like this in your project, SBT will ask you which one you want to run.
At the 2nd point, there is a defined port number we want to use, you could choose it during project initialization.
What is worth pointing out here: In our example I use Spray JSON library for marshalling and unmarshalling JSON objects, but it isn’t obligatory for you. You can use whichever JSON library you want. On this page you can find which JSON libraries Sangria can play with.
In our project I have chosen to use H2 database. It’s easy to configure and is able to run in memory -you don’t need to install any additional packages in your OS. H2 works perfectly in tutorials like this one. If you want to use another DB, it’s up to you, Slick supports many of them.
h2mem = {
   url = "jdbc:h2:mem:howtographqldb" driver = org.h2.Driver connectionPool = disabled keepAliveConnection = true
}
It’s all we need to configure the database. Now we’re ready to use it. For future purposes, we will create two additional files. DAO. scala is almost empty for now. It will be responsible for managing database connection. In the second class: DBSchema, we will put a database schema configuration and some helper functions related to the data management. The object above will be useful in the future. We will use it to set up and configure the database.
For the sake of simplicity, we won’t worry too much about blocking.
To recap, in this chapter we have learned how to: